They say eyes are the window to our soul, so we want to make them pop whenever we get the chance—and upping the volume of our lashes is a surefire way to get heads turning.
Once the strict domain of fans of OTT makeup and end-of-year dance recitals, false lashes have come a long way, and are now a main staple in the makeup bags of beauty professionals and influencers alike.
The secret to making them look like the real thing (and have people complimenting your fluttering falsies all night long) is in how you apply them… so we’ve put together your ultimate guide.
Step One: Pick The Perfect Lashes
Sure, false eyelashes can be used to create the most dramatic of eye looks… but for the most part, we love them because they give a natural-looking boost to the lashes we already have.
When choosing your lashes, think of the final look you want to achieve, keeping your natural eye shape in mind.

Deep-set eyes will benefit from a set of lashes that are longer in length towards the centre to make them appear more ‘open’, and those with slightly downturned eyes should stick to lashes that are longer on the outer edge for a lifting effect.
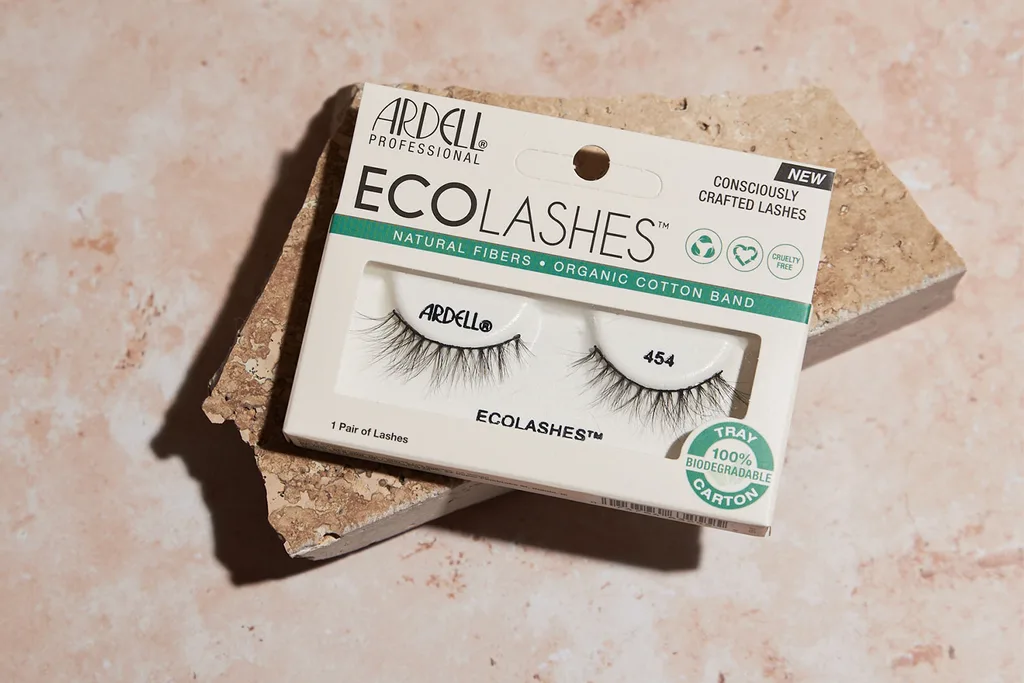
For an everyday look, try the first consciously crafted lashes – Ardell ECO LASHES. Designed with the planet in mind using ecofriendly materials, ECO LASHES are light and natural with fine tapered tips, and come in five lash styles, varying from light to medium volume and short to medium length.
The lashes are made from a natural plant-based fiber, with an organic cotton band for pure comfort—so they feel good, while looking good and doing good for the planet.
Step Two: Create A Strong Foundation
Popping false lashes on your peepers should be one of the very final steps of your makeup application, so it’s important the rest of your face is finished before you begin.
Have your smokey eye or bold liner perfected, and curl and apply mascara to your natural lashes before you begin to ensure your final look blends seamlessly.
Step Three: Measure Twice, Cut Once
Since not all eyes are created equally (or, the same size) it’s important to measure your lashes to ensure they’re going to fit perfectly for a natural and flawless finish.
The golden rule here is to take it slow, removing the lashes from packaging with a pair of tweezers from the outer edge, taking care not to bend or break the lashes.
Gently rest the strip along your lash line, aligning the beginning of the strip with where the bulk of your natural lashes begin (around two millimetres from your tear duct, to avoid irritation). The strip should end between two to four lashes inwards from your outer corner.

If you need to trim, use a pair of sharp scissors, and cut from the band side to avoid accidentally snipping excess lashes or length.
Step Four: An Unbreakable Bond
Next, dot a thin layer of glue along the band of the lashes, and wait for it to go tacky (this usually takes around 30 seconds) before aligning the lash strip with your natural lash line.
It can be easier to place the middle of the lashes first, then adhere the inner and outer corners. Press the fake lashes to your real ones with your fingers, blending them together and closing any gaps.
For the ultimate eye makeup hack, try using a glue that doubles as an eyeliner, like Ardell’s DUO Line It, Lash It 2 in 1 Eyeliner & Lash Adhesive. Not only does it secure lashes in place, but it’s richly pigmented to act as an eyeliner as well (and can even be used on its own). Just swipe along the lash line from the inner corner outwards and apply lashes directly on top.
The final step? One more coat of mascara to bond everything together, and you’re ready to step out with lashes that are natural-looking yet guaranteed to get your noticed.
Brought to you by Ardell Beauty.

